A 969 rebuild from Downunder.

Military Trucks 2 1/2 ton and greater, Wanted, For Sale (NO AUCTION or EBAY), and Knowledge Base

Moderator: kw573

Post Reply
kw573
G-Colonel
G-Colonel
Posts: 1235
Joined: Mon Aug 11, 2008 10:48 pm
Location: Near Bundaberg, Australia.

Re: A 969 rebuild from Downunder.

Post by kw573 » Tue May 15, 2018 12:53 pm

More . . . .

This is how it looks now . . . nice.

Image


And then, suddenly, it was time to start on the cranes. There are still lots of small things to do on the truck, but time to size up this job.

Image


First thing was to strip out the transmission to see what I had.

Image


. . . . hmmm, not good . . . .


Sam.
1942 Script GPW (Daily driver).
MB-T trailer.
Diamond T 969. ('The Glorifier')
Diamond T 969, rusty, complete, for sale.
Kenworth M1A1 Heavy Wrecker x 2.
M2A1 white HT. ('Clarrie')
Light Recovery Trailer (Ford?).
3ton GS (Blitz) Trailer.
150gal water tanker trailer.
Air compressor trailer, 100c.f.m.


kw573
G-Colonel
G-Colonel
Posts: 1235
Joined: Mon Aug 11, 2008 10:48 pm
Location: Near Bundaberg, Australia.

Re: A 969 rebuild from Downunder.

Post by kw573 » Wed May 16, 2018 1:32 pm

More pictures that I missed posting earlier.

When repairing the inner mudguards (a.k.a. Engine side panels), I needed to replace some caged nuts.
This is how I made the nuts. In 1/8" M.S. plate, I marked out, drilled and tapped the 1/4" UNC holes first, then cut them with the wafer disc.

Image


The new nuts with an original one to compare.

Image


While deciding what to do about the odd sized steering wheel nut, I had to identify the thread. Being a Ross brand steering box, I knew it would be a UN series thread. So measured the O.D. (outside diameter) using my trusty Dial Gauge. . .

Image


. . . and the 'pitch' of the thread using a 'Thread Pitch Gauge'. I could have measured, say, ten pitches and done the maths to find the T.P.I. = Threads Per Inch. (Metric threads use the actual pitch = distance from the top of one thread to the top of the next thread.) This was when I realized that I had a non-standard thread. It was finer than both U.N.F. and U.N.S. (special).

Image


Fortunately, the lathe I have access to has a setting for that pitch. The first job was to turn out the I.D. which took a bit of working out, I allowed 0.010" oversize for root clearance, and that worked fine.

Image


Still haven't got a fix for my Surfacezero problem. Can I fix it with the MIG welder? :?

Have a nice day.
Sam.
1942 Script GPW (Daily driver).
MB-T trailer.
Diamond T 969. ('The Glorifier')
Diamond T 969, rusty, complete, for sale.
Kenworth M1A1 Heavy Wrecker x 2.
M2A1 white HT. ('Clarrie')
Light Recovery Trailer (Ford?).
3ton GS (Blitz) Trailer.
150gal water tanker trailer.
Air compressor trailer, 100c.f.m.

kw573
G-Colonel
G-Colonel
Posts: 1235
Joined: Mon Aug 11, 2008 10:48 pm
Location: Near Bundaberg, Australia.

Re: A 969 rebuild from Downunder.

Post by kw573 » Thu May 17, 2018 1:14 pm

Hi all,

For some reason, I did not do this "shift plate panel" when I was doing the cabin panel work. Using 1/8" plate, I folded a 'U' shape along the rear edge as it is open under this. Strangely, I have seen at least two designs of this part of the cabin. The other design has a vertical plate from the rear edge of this panel to the floor, but the seat base is open to make a little hidey-hole under this shift plate panel.

Image


It was surprisingly tricky to find the correct curves and angles, back and forth with scissors and cardboard. I used this profile gauge to find the trickiest part.

Image


Still more back-and-forth to get the angle and distances correct. Then paint and bolt it down with 1/4" UNC round head slot drive bolts and nuts, three along the front edge and one from the outside of the cabin at the rear of the panel. One more job done.

Image


Also, here is a picture of the finished tail light. Next time, I'll drill the bulb holder higher in the back of the insert so as to have the bulb filament level with the middle of the lens. Sorry about the shadows.

Image


At the left of this picture (above) can be seen the left side hook anchour loop (anchour = Australian spelling) which I made recently. I had made the right side one a long time ago. They are designed to bend open if too much power is applied, instead of bending and breaking something. Good idea as in the military, I guess that there was no guarantee that the operator would be competent.
This is how I set up to make the first bend. I had to be careful as I used heat and didn't want to damage the socket.

Image


Enjoy.

Sam.
1942 Script GPW (Daily driver).
MB-T trailer.
Diamond T 969. ('The Glorifier')
Diamond T 969, rusty, complete, for sale.
Kenworth M1A1 Heavy Wrecker x 2.
M2A1 white HT. ('Clarrie')
Light Recovery Trailer (Ford?).
3ton GS (Blitz) Trailer.
150gal water tanker trailer.
Air compressor trailer, 100c.f.m.

kw573
G-Colonel
G-Colonel
Posts: 1235
Joined: Mon Aug 11, 2008 10:48 pm
Location: Near Bundaberg, Australia.

Re: A 969 rebuild from Downunder.

Post by kw573 » Tue May 22, 2018 11:57 am

Hi all,
I have stripped out the Holmes transmission and this is what I've found. As with most of the gear cases I've opened on this truck, I looks like it has never had lube added (beyond assembly lube) when last re-built! Makes me wonder what happened to this truck in the past.
Condensation has done its' damage!

The brass worm wheels seem to have very little wear . . .

Image


. . . however, the steel worms which are in the bottom of the case have been in the buildup of moisture from condensation and are badly corroded for a small section of them but on every tooth.

Image


So I tried to use a puller to dis-assemble the shafts, but it was very tough work . . . .

Image


. . . . so I used a press and they came apart easily. I was a bit surprised that the puller was good for only a ton or so of pressure. The press I subsequently used registered barely 4 tons and they came apart easily. I need a press!!! Anyone know where I can buy a 60ton 'Servex' press (or similar) in Australia?

Anyway, here is what I had.

Image


And all cleaned up.

Image

Image


There are 6 bearings and 1 seal, all stuffed, of course.

Enjoy.
Sam.
1942 Script GPW (Daily driver).
MB-T trailer.
Diamond T 969. ('The Glorifier')
Diamond T 969, rusty, complete, for sale.
Kenworth M1A1 Heavy Wrecker x 2.
M2A1 white HT. ('Clarrie')
Light Recovery Trailer (Ford?).
3ton GS (Blitz) Trailer.
150gal water tanker trailer.
Air compressor trailer, 100c.f.m.

kw573
G-Colonel
G-Colonel
Posts: 1235
Joined: Mon Aug 11, 2008 10:48 pm
Location: Near Bundaberg, Australia.

Re: A 969 rebuild from Downunder.

Post by kw573 » Wed May 23, 2018 12:57 pm

Hi everyone,

I've started some prep work on the Holmes transmission . . .

Image


. . . then had a look at the worm shafts. Badly corroded. I'm tempted to have a go at welding them some time in the future and then chase the thread in a lathe. The pitch is 3/4" = 1 1/3T.P.I.

Image


So I stripped out the transmission of a second set of cranes only to find a different situation of corrosion. This set had oil in it, keeping the worm shaft clean, except the top third was above the oil and so has deep surface rust. Nowhere near as bad as the original set. Realizing that the steel is quite soft (center punch test), I tried to file the rust off and got this result.

Image

Image


It is a bit hard to see in the pictures, I have managed to file the worm enough to have maybe 80% clean metal on the face of the tooth. The remaining rust pits will act as oil reservoirs, like hone marks in an engine bore . . . I hope. Also, I inspected the undamaged tooth faces and was surprised how poorly finished they were. My concern was that under working pressure, the edges of the pits may broach (scrape) the brass worm wheel. The more I think about it, the more comfortable I am with this solution.

Image


And this is how the worm shaft and worm wheel work together. I haven't calculated it, but the gear ratio of this gear set is probably around 30:1. Although it is not true, from a theory point of view, the worm won't drive the worm wheel thus making it a self locking drive, a great benefit for winching. However, on more than one occasion I have had a worm wheel drive a worm shaft under load, thus reversing the winch. That could be disastrous at the wrong time!

Image


So far, so good.
I have lots of paid work right now, so not a lot of workshop time happening :( .

Have a nice day.
Sam.
1942 Script GPW (Daily driver).
MB-T trailer.
Diamond T 969. ('The Glorifier')
Diamond T 969, rusty, complete, for sale.
Kenworth M1A1 Heavy Wrecker x 2.
M2A1 white HT. ('Clarrie')
Light Recovery Trailer (Ford?).
3ton GS (Blitz) Trailer.
150gal water tanker trailer.
Air compressor trailer, 100c.f.m.

kw573
G-Colonel
G-Colonel
Posts: 1235
Joined: Mon Aug 11, 2008 10:48 pm
Location: Near Bundaberg, Australia.

Re: A 969 rebuild from Downunder.

Post by kw573 » Sat May 26, 2018 1:23 pm

Greetings fellow MVers!

Last week I mucked around with some Holmes parts, firstly the controls mechanism.
These are 7/8" (22mm) rods that run the width of the Holmes crane frame allowing the cranes to be operated from either side of the truck. These were very corroded in places and took some disassembling without breaking anything.

Image

Image


It was a bit of "6 one way, 1/2doz the other way" whether to repair or make new ones. In the end, it was easier for me to weld the corrosion than to buy new shafts and have the three woodruff key slots milled into them.

So . . . .

Image


To smooth down the shafts after welding, I used the flat of an angle grinder disc, worked fine, but I will have to finish a few sections with a file to achieve a consistent diameter as there is a lever that is a neat slide fit on the shafts. More on that later. There was some heat induced bending of the shafts as expected, that was simple to straighten by eye by prying it in a gap in the Holmes main frame (tower?).

Image


I also disassembled, cleaned, painted and assembled the neutral return mechanism. That is my name for it, dunno what else to call it. There are two of them, one for each side winch drive. Reassembling the spring was troublesome until I gave in trying to take the short cut, and wired the spring in its' compressed position. I compressed it in the vise and used 1/16" welding wire as tie-wire. As with any spring compression, I had to take care to keep it under control so as to ensure it didn't end up in my nose (or wherever). The tie wire took a bit of pulling out when the spring was in place! The mechanism was still a bit tricky, the "fork rocker" (my name) had to slide onto its' shaft at the same time as the spring was coaxed onto its' seat. And hold the woodruff key on place at the same time.

Image


And test fitted to the case.

Image


Waiting for bearings to arrive, so I cut some gaskets.

Image


This is my solution to mounting the front number plate - out of the way, protected, visible, no extra holes needed.

Image


Rear number plate mount has been designed, made and is now being painted. It was a bit unexpected how many small jobs there are to do now that the Glorifier is very driveable. It is regularly taken for a spin now to give someone a ride, test some new addition, or just for fun. Getting better at the gears down-shifting, knowing where its' corners are and judging its' turning circle.


Enjoy.

A very happy . . .
Sam.
1942 Script GPW (Daily driver).
MB-T trailer.
Diamond T 969. ('The Glorifier')
Diamond T 969, rusty, complete, for sale.
Kenworth M1A1 Heavy Wrecker x 2.
M2A1 white HT. ('Clarrie')
Light Recovery Trailer (Ford?).
3ton GS (Blitz) Trailer.
150gal water tanker trailer.
Air compressor trailer, 100c.f.m.

kw573
G-Colonel
G-Colonel
Posts: 1235
Joined: Mon Aug 11, 2008 10:48 pm
Location: Near Bundaberg, Australia.

Re: A 969 rebuild from Downunder.

Post by kw573 » Sun May 27, 2018 12:59 pm

Hi all,
Back on P.49, I described some drag link repairs, but here is a picture I missed.
It shows the incorrect fitting of the Drag Link, the 'long' end being rearward, which allows it to hit the mudguard bracket on a full right turn.

Image


And back on P.52, I described the door catches being angled, here are some pictures that I omitted to post then. Firstly, here is the mechanism assembled . . .
The small green arrow is where the lever pushes the slide to open the door. The small blue arrow at the left shows the pawl that engages on the striker when the door is closed.

Image


. . . and this picture shows the angle that the mechanism will be at when fitted to the inside of the door.

Image


Enjoy.

Sam.
1942 Script GPW (Daily driver).
MB-T trailer.
Diamond T 969. ('The Glorifier')
Diamond T 969, rusty, complete, for sale.
Kenworth M1A1 Heavy Wrecker x 2.
M2A1 white HT. ('Clarrie')
Light Recovery Trailer (Ford?).
3ton GS (Blitz) Trailer.
150gal water tanker trailer.
Air compressor trailer, 100c.f.m.

kw573
G-Colonel
G-Colonel
Posts: 1235
Joined: Mon Aug 11, 2008 10:48 pm
Location: Near Bundaberg, Australia.

Re: A 969 rebuild from Downunder.

Post by kw573 » Mon May 28, 2018 1:15 pm

Hi all,

More random pictures missed at the time . . .

Rear vision mirror arms being painted (see p.48) . . . .

Image


. . . and the manufacture of the extra RV mirror arm. This is a length of 2 1/4" exhaust pipe with a convenient bend in it and then a length of 1" dia. pipe with a convenient bend.

Image

Image


When I say 'convenient', it means that I did not have it made, rather I found a piece, discarded from elsewhere, usually at the scrap metal recyclers, to do the job. I usually buy it at $1/kg, indeed, that is how I purchased most of the intake and exhaust pipe, including the bends (I did have to buy a 'donut'). I am on a first name basis there! :D
This resourcefulness is a huge part of the satisfaction of the rebuild, also allowing the more timely purchasing of items like paint, bearings, etc because of money I didn't spend elsewhere.
I then bought a new modern RV mirror with a good sized spot mirror to go on the arm. Those of you who drive LHD Jeeps/Dodges/etc in RHD countries will understand the difficulty in RH side rear vision when driving in traffic. For the Glorifier, add the height of the cabin and rear body blocking the drivers view to the right side and immediate right rear of the vehicle and I can see me doing a lane change to the right and running over a little car. It would feel like I just hit a pothole, but for the little car . . . . . :o

It is mounted in the machine gun ring post bracket, which is 2 1/4" I.D. and I am already making good use of it when moving the Glorifer around the yard.

Image


Enjoy!

Sam.
1942 Script GPW (Daily driver).
MB-T trailer.
Diamond T 969. ('The Glorifier')
Diamond T 969, rusty, complete, for sale.
Kenworth M1A1 Heavy Wrecker x 2.
M2A1 white HT. ('Clarrie')
Light Recovery Trailer (Ford?).
3ton GS (Blitz) Trailer.
150gal water tanker trailer.
Air compressor trailer, 100c.f.m.

kw573
G-Colonel
G-Colonel
Posts: 1235
Joined: Mon Aug 11, 2008 10:48 pm
Location: Near Bundaberg, Australia.

Re: A 969 rebuild from Downunder.

Post by kw573 » Tue May 29, 2018 1:07 pm

Some more stuff I've been doing . . . .


After the painting, I was able to fit the rear number plate bracket with light. I've just noticed that it is a bit crooked. Dunno if I can tolerate that or not (my black-and-white thinking!). :?

Image


The feed for the number plate light came from the convenient terminals on the back of the trailer plug. Incidentally, I am wiring the plug with park/brake/left/right and am running a separate wire for the earth. That is the most tidy way I could think to have indicators on the trailer that I plan to use with the Glorifier.

Image


Each time I come across small standard items that suit WW2 MVs., I grab them. Hence I have odd bits of 1/8" chain. The 1/8" describes the diameter of the steel that each link is made of. And 1/4" split pins, a.k.a."cotter pins".
So, I could do this . . .

Image


. . . . and then this. But I might shorten up the chain a bit. Does anyone have a period picture that I could use as a guide to adjust the length of the chain?

Image


Enjoy!
Sam.
1942 Script GPW (Daily driver).
MB-T trailer.
Diamond T 969. ('The Glorifier')
Diamond T 969, rusty, complete, for sale.
Kenworth M1A1 Heavy Wrecker x 2.
M2A1 white HT. ('Clarrie')
Light Recovery Trailer (Ford?).
3ton GS (Blitz) Trailer.
150gal water tanker trailer.
Air compressor trailer, 100c.f.m.

kw573
G-Colonel
G-Colonel
Posts: 1235
Joined: Mon Aug 11, 2008 10:48 pm
Location: Near Bundaberg, Australia.

Re: A 969 rebuild from Downunder.

Post by kw573 » Wed May 30, 2018 1:10 pm

Hi all,

Significantly, I started work on the Holmes Crane frame, or is it called a tower? The parts book calls it a frame, so I will also.

As sometimes happens, I thought that I'd do a little job, not really intending to make the decision to make a proper start on the frame. I'd just grind off a series of nuts welded on, probably to secure wiring . . . .

Image


. . . . but while I'm there, I'll remove some other added brackets . . . .

Image


. . . and before I know it, I'm working my way along the entire top section of the frame!


Why have these been cut off? Both the Oxy bottle and Acetylene bottle rack have been cut like this. Anyone seen this before?

Image


I also wanted to ask about the connector I used for the earth wire for the trailer lights. They are brass, about 4mm diameter with a substantial spring clip. Good to solder a wire in and insulate with thermal shrink tube. I bought them at a swap meet years ago and they are a very high quality item. Does anyone recognize them? They work great!!

Image

Image


Have a nice day.
Sam.
1942 Script GPW (Daily driver).
MB-T trailer.
Diamond T 969. ('The Glorifier')
Diamond T 969, rusty, complete, for sale.
Kenworth M1A1 Heavy Wrecker x 2.
M2A1 white HT. ('Clarrie')
Light Recovery Trailer (Ford?).
3ton GS (Blitz) Trailer.
150gal water tanker trailer.
Air compressor trailer, 100c.f.m.

User avatar
D Pizzoferrato
G-Colonel
G-Colonel
Posts: 1664
Joined: Fri Dec 13, 2002 4:15 pm
Location: Richmond Ohio
Contact:

Re: A 969 rebuild from Downunder.

Post by D Pizzoferrato » Wed May 30, 2018 4:50 pm

Sam,

Those connectors are common on 24 Volt M Series Vehicles. They are the interior pin and socket used in assembling a Cannon Connector Male and Female plug. You can go crazy here http://www.newark.com/c/connectors/cir ... j-EALw_wcB
David Pizzoferrato
Pizzoferrato Ent./Weebee Webbing
Visit our Website! www.odcloth.com for your Canvas needs

kw573
G-Colonel
G-Colonel
Posts: 1235
Joined: Mon Aug 11, 2008 10:48 pm
Location: Near Bundaberg, Australia.

Re: A 969 rebuild from Downunder.

Post by kw573 » Sat Jun 02, 2018 1:47 pm

Thanks for that Dave,
Wow, there are lots of connectors there, but I didn't see the brass connectors separate.

My surfacezero account is playing up like a 2 bob watch, I've PMed 'Blackdog', had no reply. HELP!!!!

Here are a couple of pictures that I think I have missed. You may recall that I made new rebated strips to repair the rust above the flutes on the bonnets. This how I made them. The machine is an old school sheet metal shaping tool called, variously, 'burring machine', 'swagging machine', et al. Amazing work can be done on these machines if you have the dies and know what you are doing. Capable of producing sheet metal shapes that look like they have been stamped in a die. This one has a very short throat, I've seen them with 300 - 400mm throats.

Image


And using some small grinder wheels in my die grinder to access difficult surfaces inside the bonnet flutes.

Image


When I was fitting the doors, I just couldn't manage to have the pawl click past and lock behind the striker plate. In the end, I had to remove about 1/8" from the striker plate (see witness marks in picture) and they work like new now.

Image


Did I say I need help with my surface zero account????

Have a nice weekend.

Sam.
1942 Script GPW (Daily driver).
MB-T trailer.
Diamond T 969. ('The Glorifier')
Diamond T 969, rusty, complete, for sale.
Kenworth M1A1 Heavy Wrecker x 2.
M2A1 white HT. ('Clarrie')
Light Recovery Trailer (Ford?).
3ton GS (Blitz) Trailer.
150gal water tanker trailer.
Air compressor trailer, 100c.f.m.

User avatar
D Pizzoferrato
G-Colonel
G-Colonel
Posts: 1664
Joined: Fri Dec 13, 2002 4:15 pm
Location: Richmond Ohio
Contact:

Re: A 969 rebuild from Downunder.

Post by D Pizzoferrato » Sun Jun 03, 2018 3:42 am

kw573 wrote:
Sat Jun 02, 2018 1:47 pm
Thanks for that Dave,
Wow, there are lots of connectors there, but I didn't see the brass connectors separate.
Sam.
Sam, try a google search for Military Amphenol Connector Contacts or Military Cannon Connector Contacts. The Amphenol and Cannon type connectors are assembled from gender specific components. You typically purchase the Male and Female components for your application (wire size, pin count,etc), then assemble the connectors. Your pins shown are a Male and Female Pin and Socket that are intended to be inserted into the appropriate gender specific connector as an assembly step.
David Pizzoferrato
Pizzoferrato Ent./Weebee Webbing
Visit our Website! www.odcloth.com for your Canvas needs

kw573
G-Colonel
G-Colonel
Posts: 1235
Joined: Mon Aug 11, 2008 10:48 pm
Location: Near Bundaberg, Australia.

Re: A 969 rebuild from Downunder.

Post by kw573 » Sun Jun 03, 2018 1:48 pm

Righto Dave, thanks.

I also read your PBR story. Makes my rebuild look like a walk in the park! Well done.

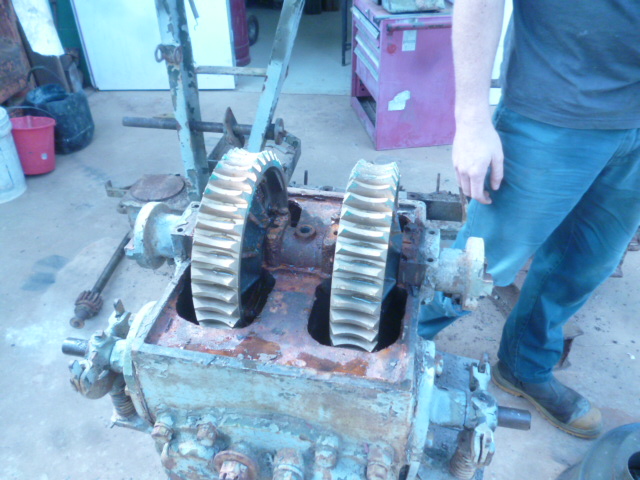
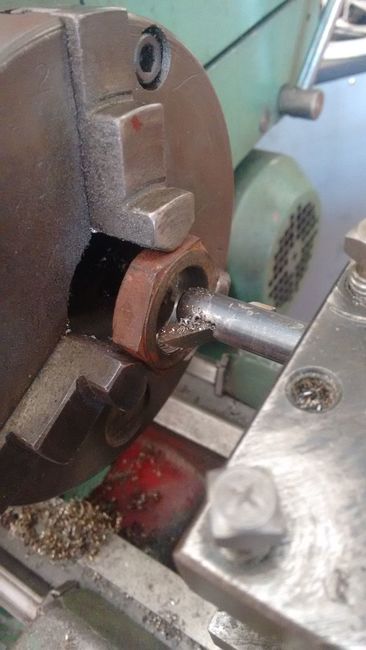
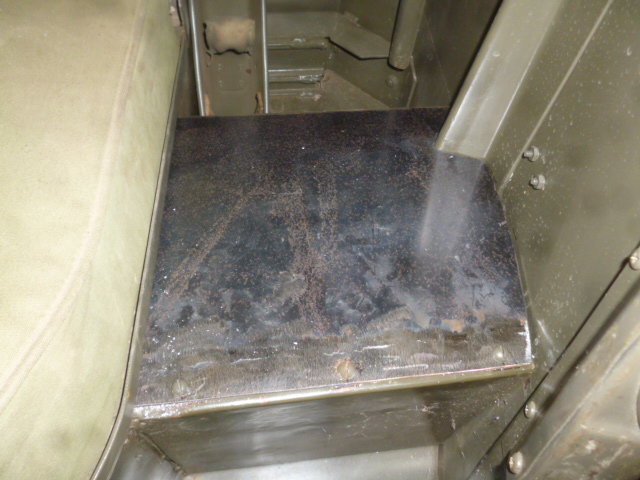
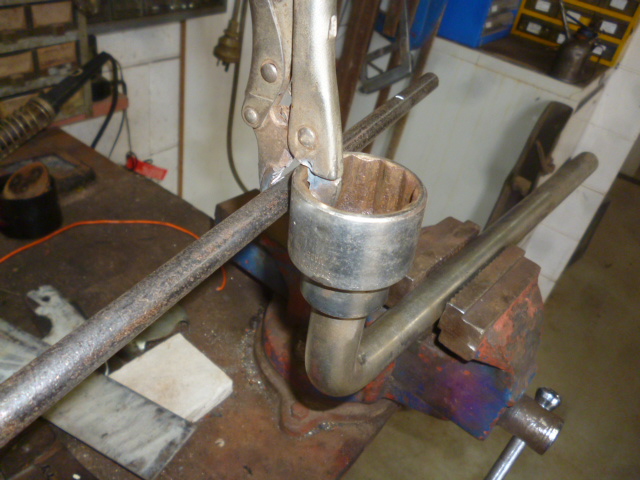
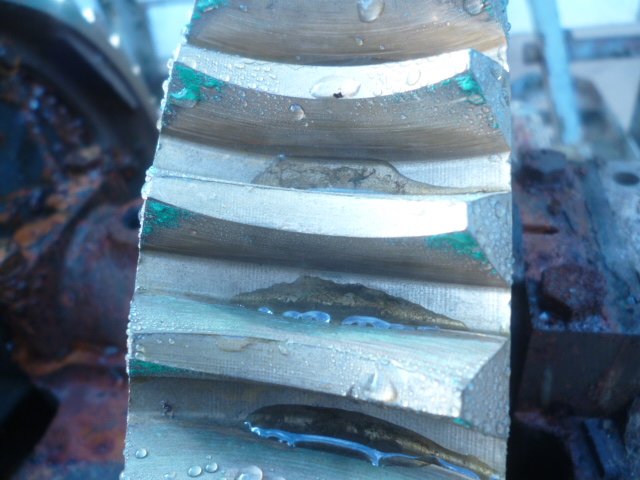
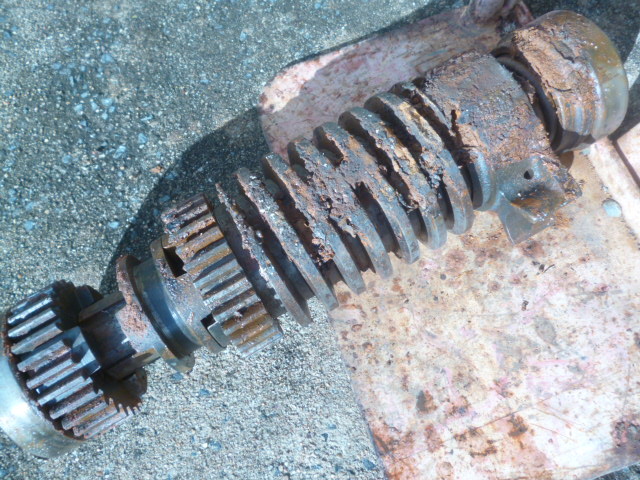
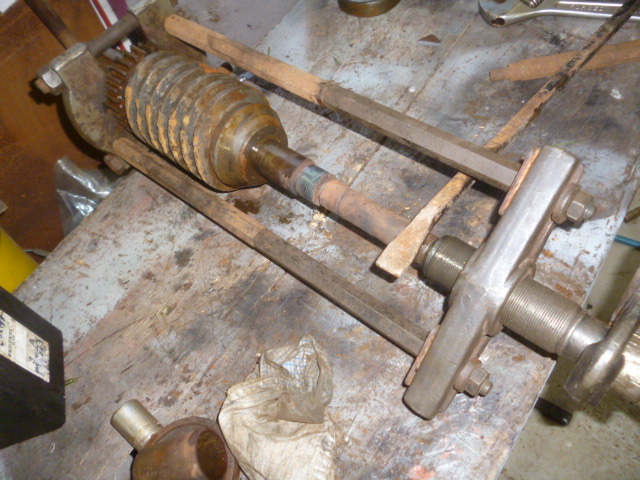
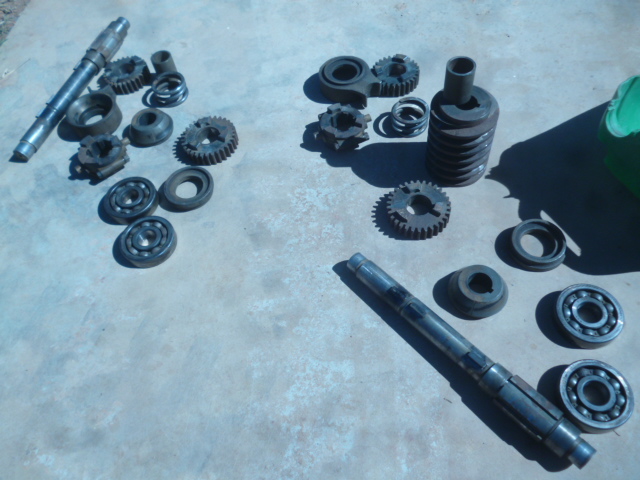
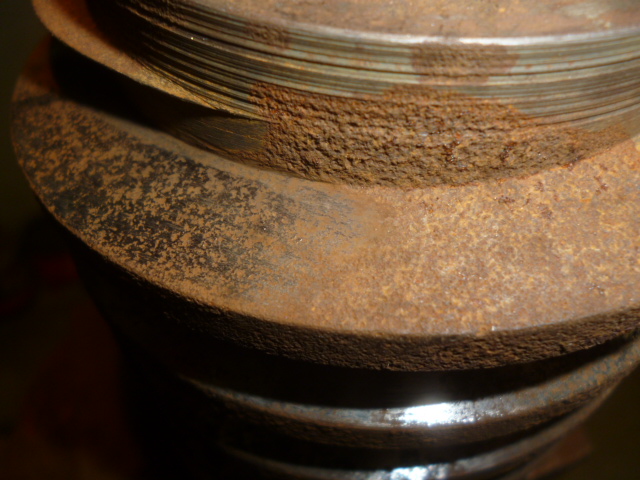
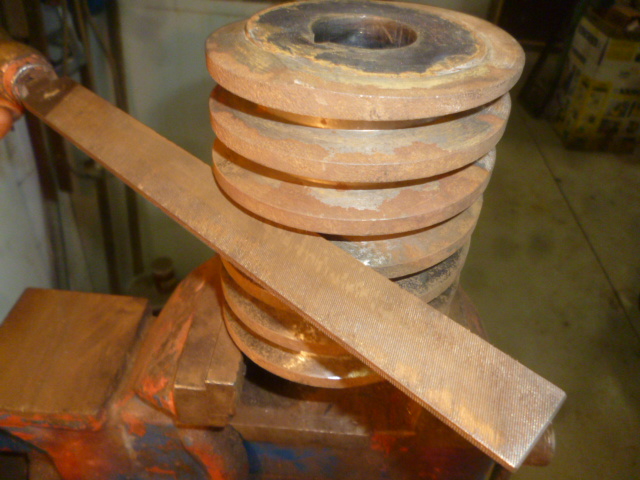
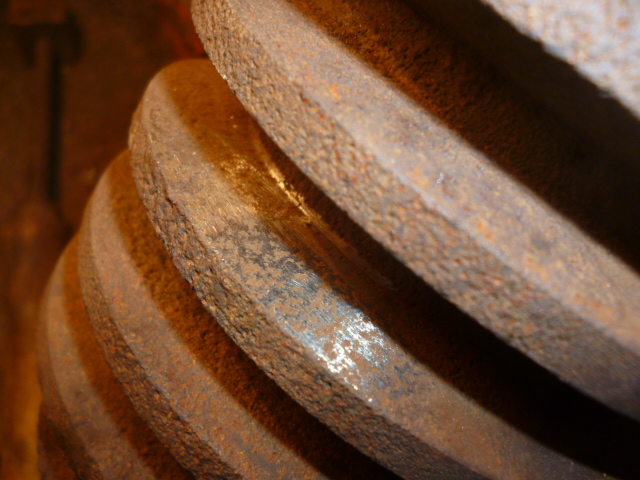
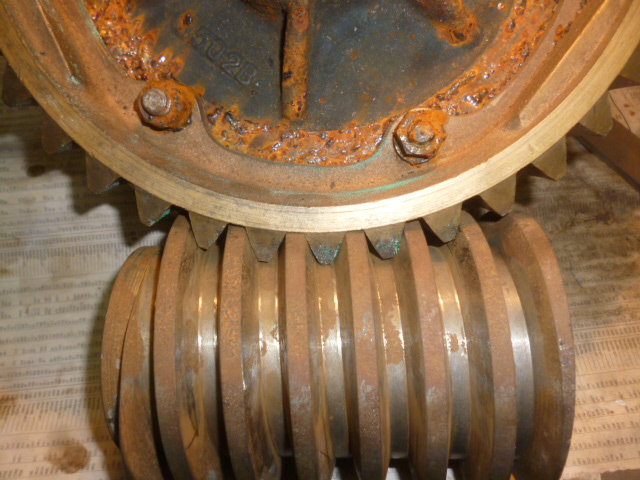
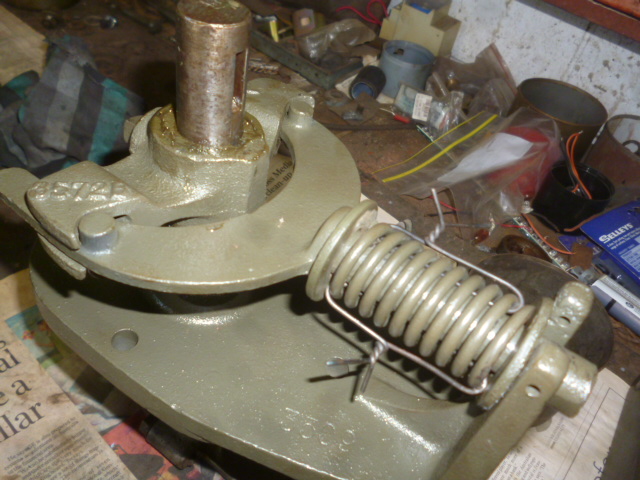
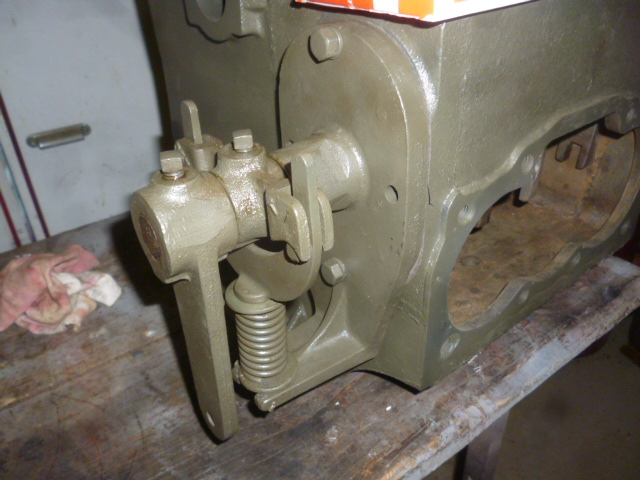
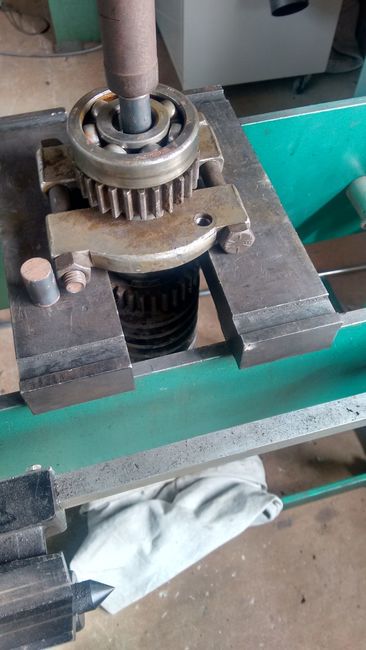
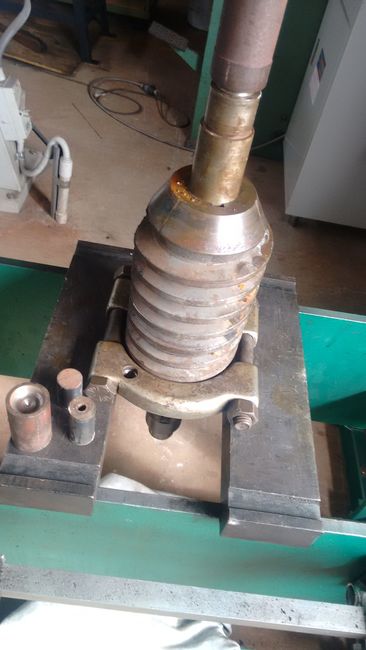
Here are some pictures of pressing the Holmes transmission apart. This was after I had tried to use a puller, . . . unsuccessfully.

Image

Image


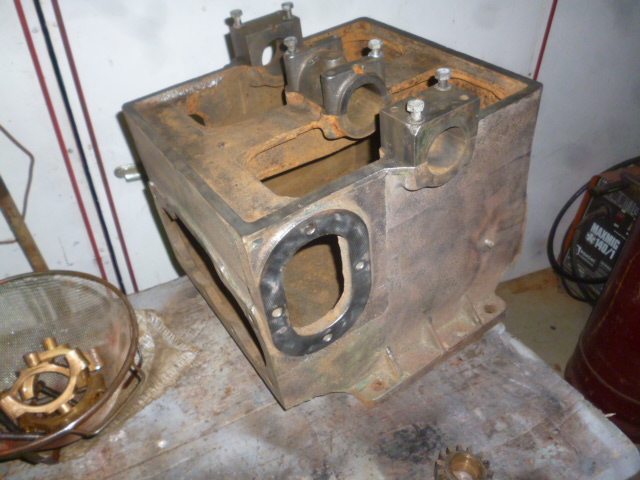
I continue to work my way along/down the Holmes main frame with needle gun (to quickly remove the thick layers of loose paint and any loose rust), then the angle grinder-mounted 'bevel' wire brush which is a savage tool and has to be used with great presence-of-mind. Next, if needed, is a flapper disc on the angle grinder. These discs give me varying results. Sometimes it seems that they get too hot and then slide across the surface with little effect, but changing location and/or angle and off it goes again. I dunno! :?:
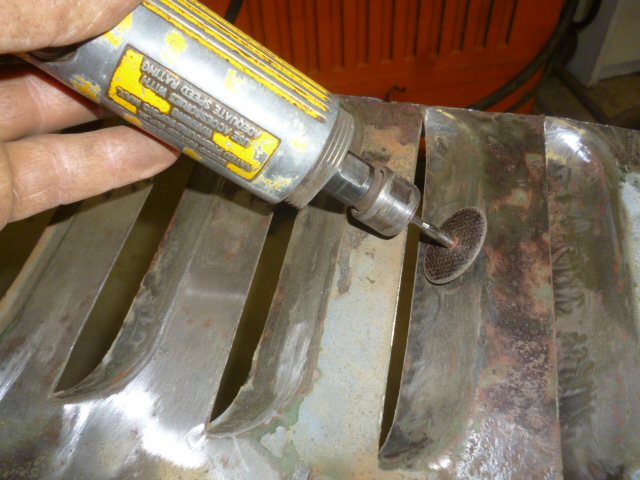
Then I apply a light coat of phosphoric acid. Well, actually, I really only just dampen the surface, hardly use much at all except on more heavily pitted surfaces. It takes barely a few minutes to do its' work. Commercial products based on Phosphoric acid have the instruction to not let it dry on the surface but I have repeatedly done so due to other imperatives. The jury is still out. I managed to convince a chemical wholesaler to sell me 500mls which he said would do my whole truck, use at 5% in water.
Also, those instructions say to wipe off the excess with a damp rag. This is what stops a lot of panel restorers, not wanting to put water onto a largely clean steel panel. But it didn't say 'water', it said 'damp'. So I use a rag dampened with thinners (no paint on the panel) or prep-wash (with paint that needs to stay on the panel). Also, wiping with a rag will hardly remove all the acid from a rough-cast or pitted surface. Further, sometimes I will still use water on a larger more involved surface, but am pretty prompt in drying the bare steel surfaces.
Sometimes, I'll see the burnt-orange-ish tinge starting to appear after drying the steel, which, of course is rust starting again. Known in some places as 'flash-rust'. I know one restorer who likes that as it indicates an otherwise clean surface which he then rubs down with 1000 grit before applying substrates.

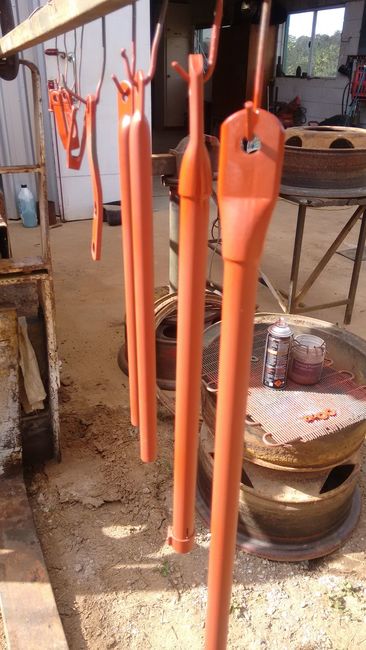
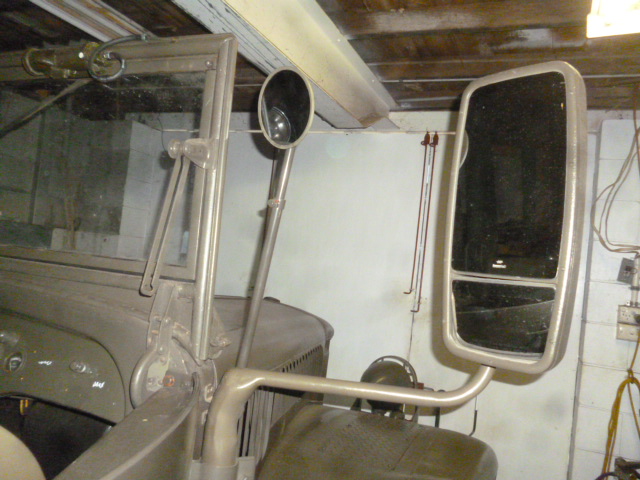
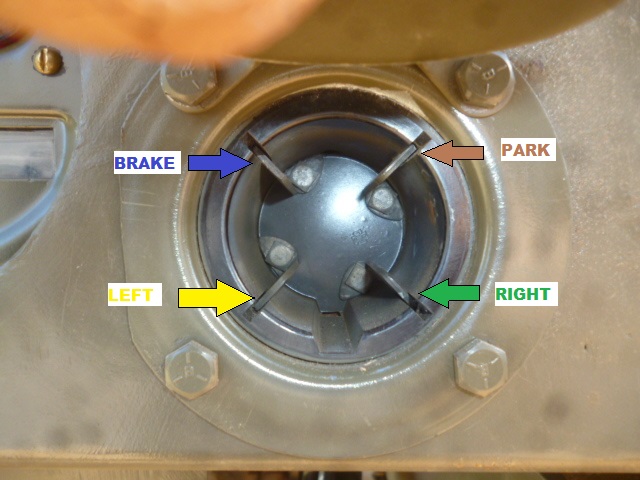
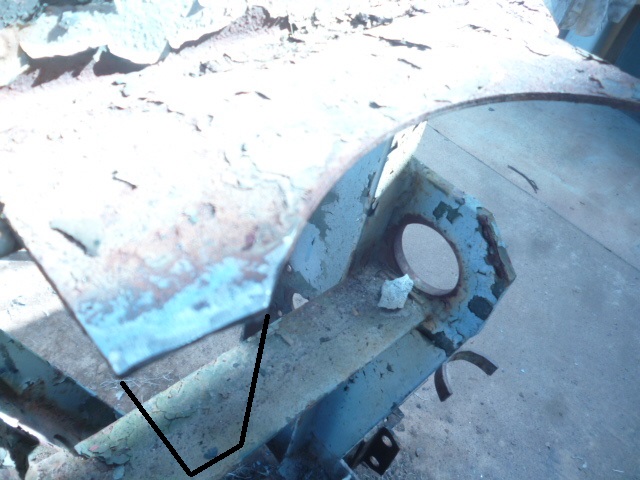
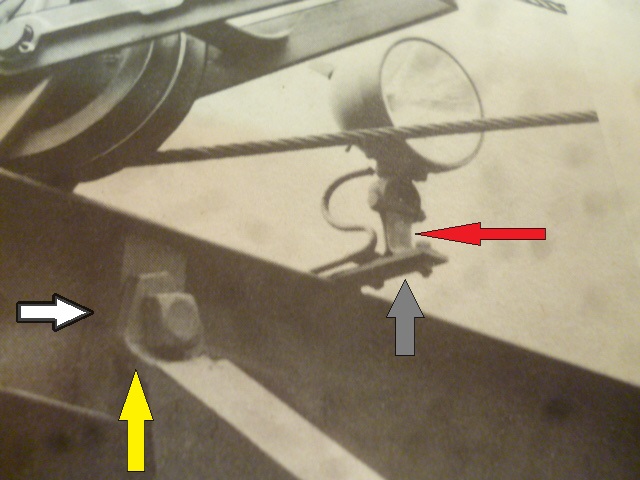
Anyway, my attention is sometimes drawn to related parts yet to be done and I spend some time on them just for a bit of a change. To that end, I collected the parts for the worklights. Here is a TM picture I used to help as my mounts were cut off. The gray arrow shows the brackets to be made and welded on, the red arrow shows the bracket that the lights often are missing. I could use another two of these if anyone has an orphaned pair that need a home. PLEEEEESE!!!

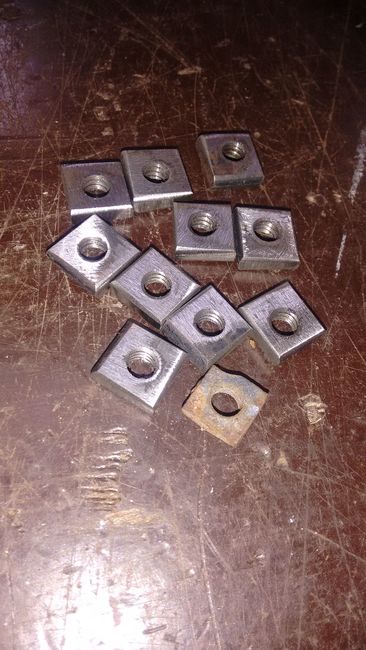
While on that picture, the white arrow shows the spacer block that I thought I needed, but unexpectedly found a pair in an unrelated box of bits. Also bought a pair from an MV mate who did not know what they were until I asked about them.

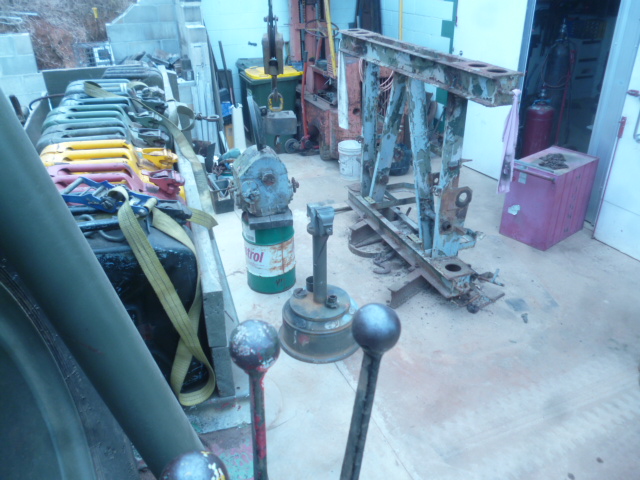
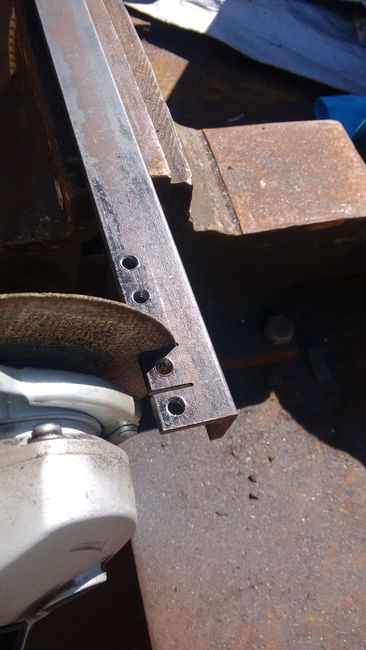
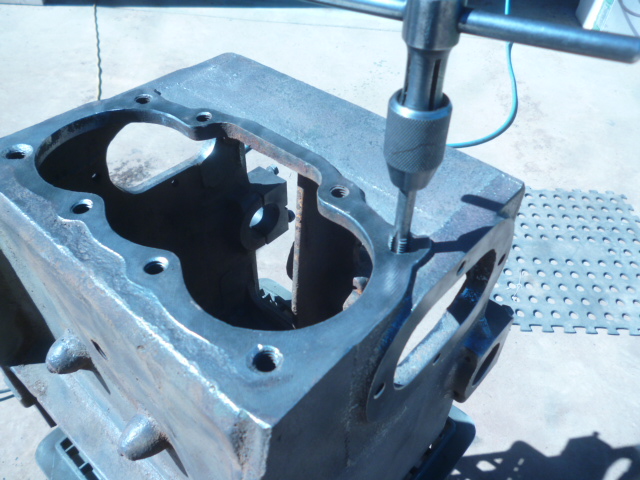
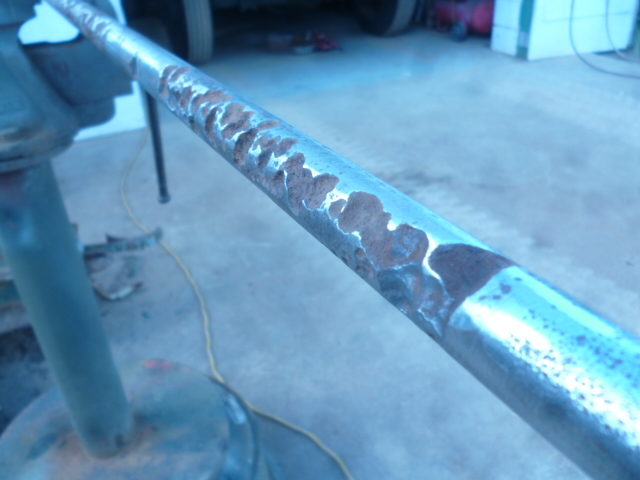
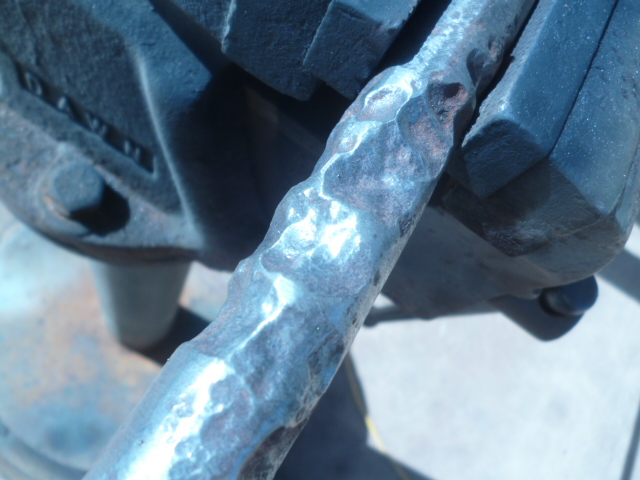
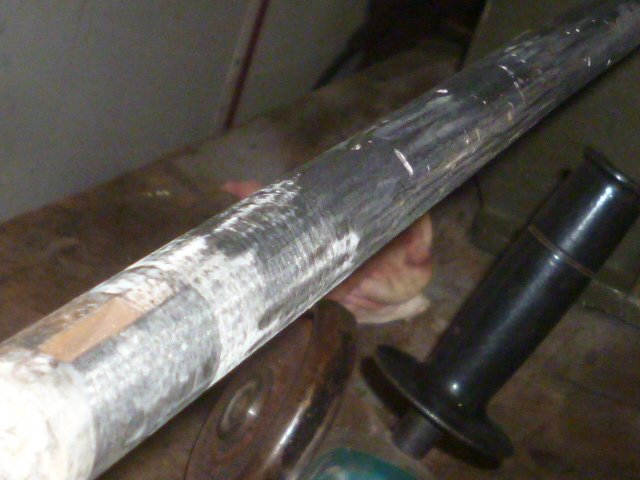
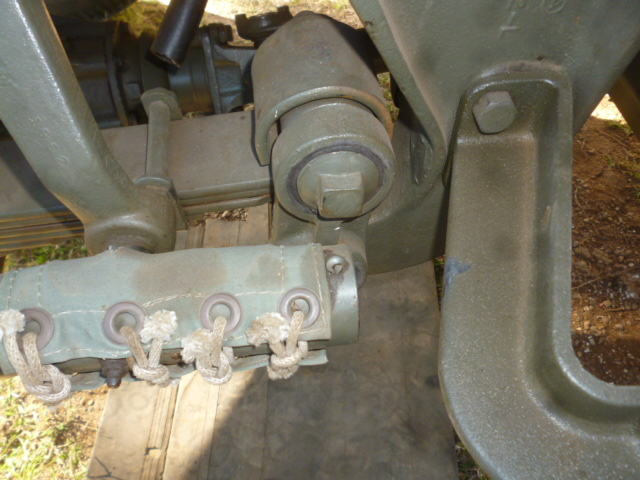
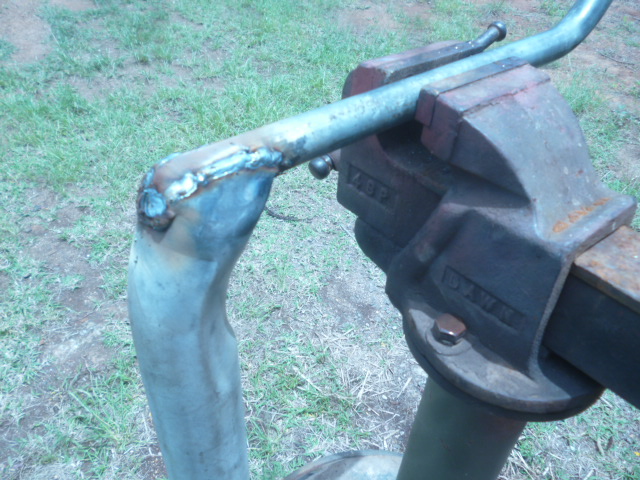
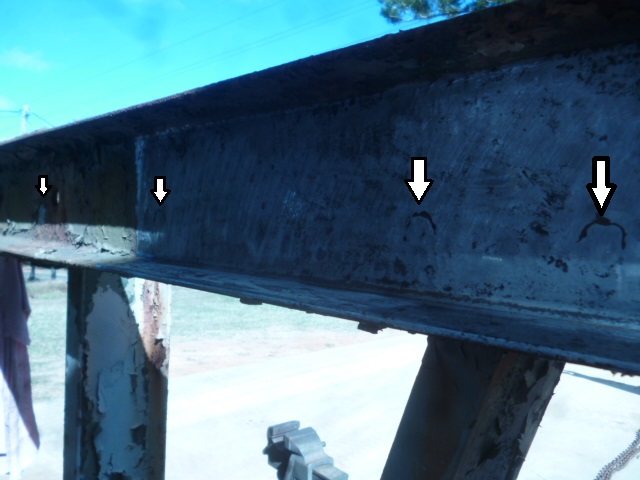
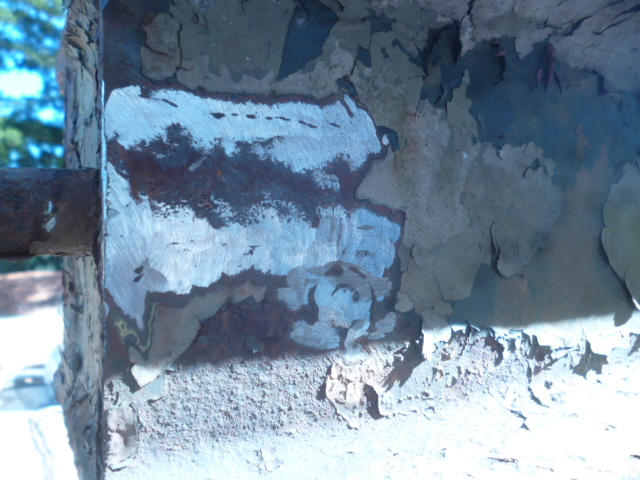
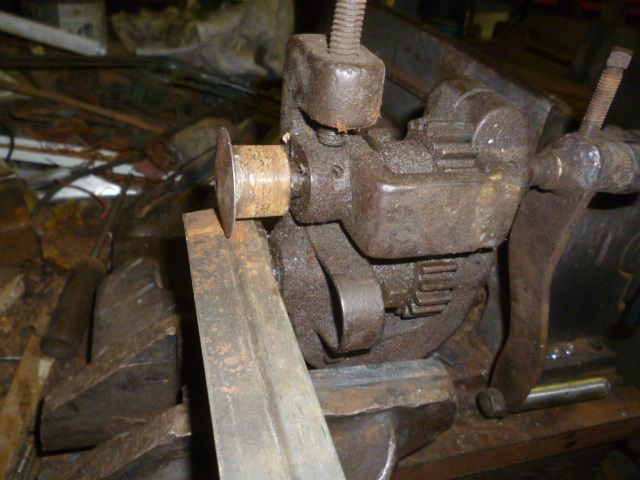
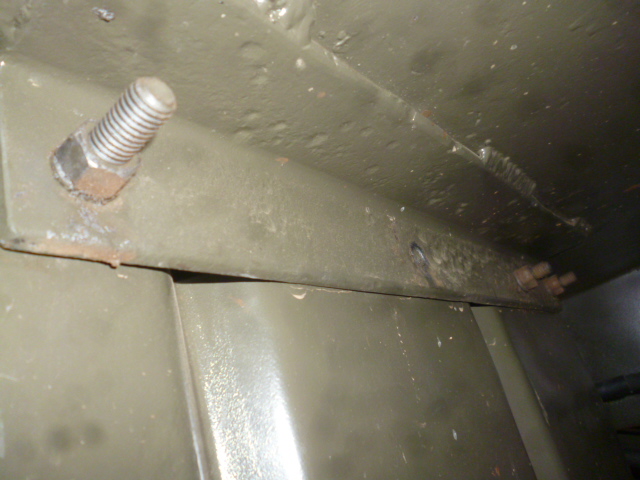
Strangely, the 'stiff-leg'/'bolster'/'A-frame' uses four large square-headed bolts, 2 off 1"x 9" at the top and 2 off 1"x 4"(?) at the bottom. See picture below. Why square heads? There is also a square head bolt holding the cover on the Holmes transmission. Why square? I am using re-purposed bridge bolts found near timber railway bridges for these bolts.
The bracket at the yellow arrow has also been butchered and will need attention, more on that later.

Image


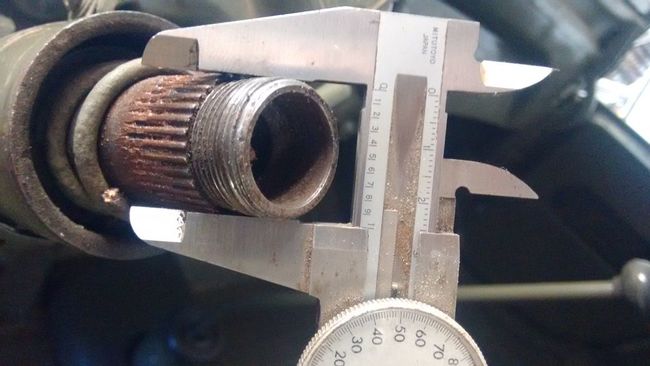
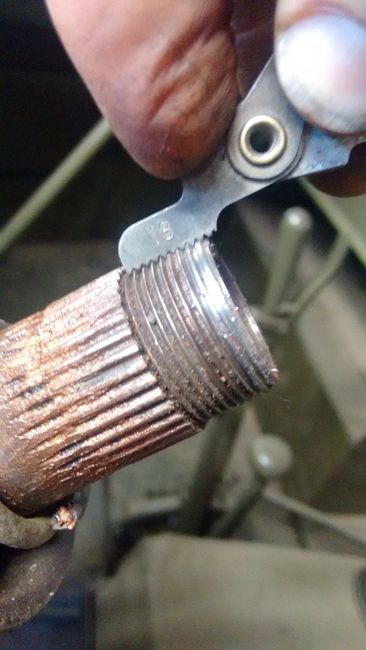
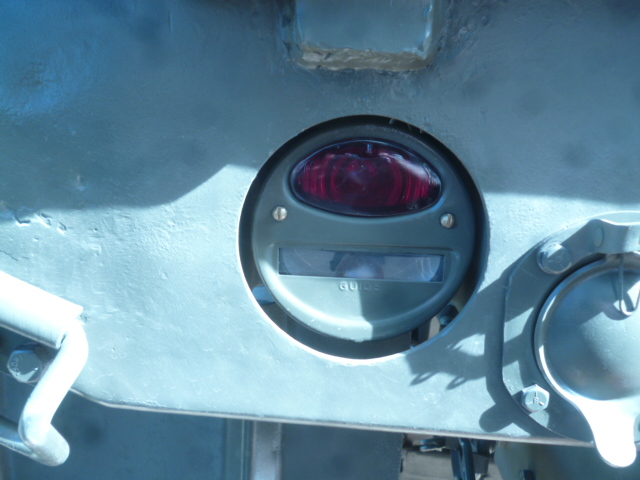
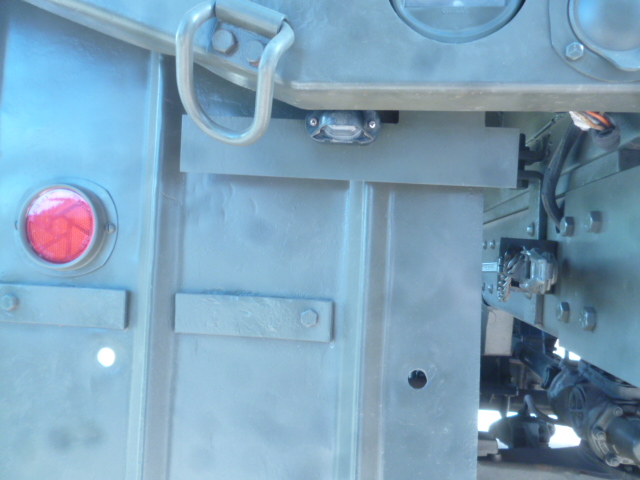
While doing the rear lights, I noticed the long thread exposed on the mudguard bolts. According to the Parts Manual, they are 1 1/2" long, correct. But I cannot abide all that thread being exposed and corroded. So I replacing them with 1" bolts.

Image


Have a nice week.
Sam.
1942 Script GPW (Daily driver).
MB-T trailer.
Diamond T 969. ('The Glorifier')
Diamond T 969, rusty, complete, for sale.
Kenworth M1A1 Heavy Wrecker x 2.
M2A1 white HT. ('Clarrie')
Light Recovery Trailer (Ford?).
3ton GS (Blitz) Trailer.
150gal water tanker trailer.
Air compressor trailer, 100c.f.m.

User avatar
D Pizzoferrato
G-Colonel
G-Colonel
Posts: 1664
Joined: Fri Dec 13, 2002 4:15 pm
Location: Richmond Ohio
Contact:

Re: A 969 rebuild from Downunder.

Post by D Pizzoferrato » Sun Jun 03, 2018 5:07 pm

Thanks for the kind thoughts Sam. Although the PBR project was not for the faint of heart, I am continually amazed at your solutions to ongoing obstacles. I am drawn to your postings like a bug to a porch light.
David Pizzoferrato
Pizzoferrato Ent./Weebee Webbing
Visit our Website! www.odcloth.com for your Canvas needs


Post Reply

Return to “Trucks 2 1/2 ton +”

Who is online

Users browsing this forum: No registered users and 35 guests