M151A1 begining of new project

M151 General Discussion and Chat Board
Post Reply
User avatar
Hell On Wheels
G-Colonel
G-Colonel
Posts: 1530
Joined: Fri May 04, 2007 1:19 pm
Location: San Antonio, TX
Contact:

Re: M151A1 begining of new project

Post by Hell On Wheels » Wed Nov 17, 2021 5:02 pm

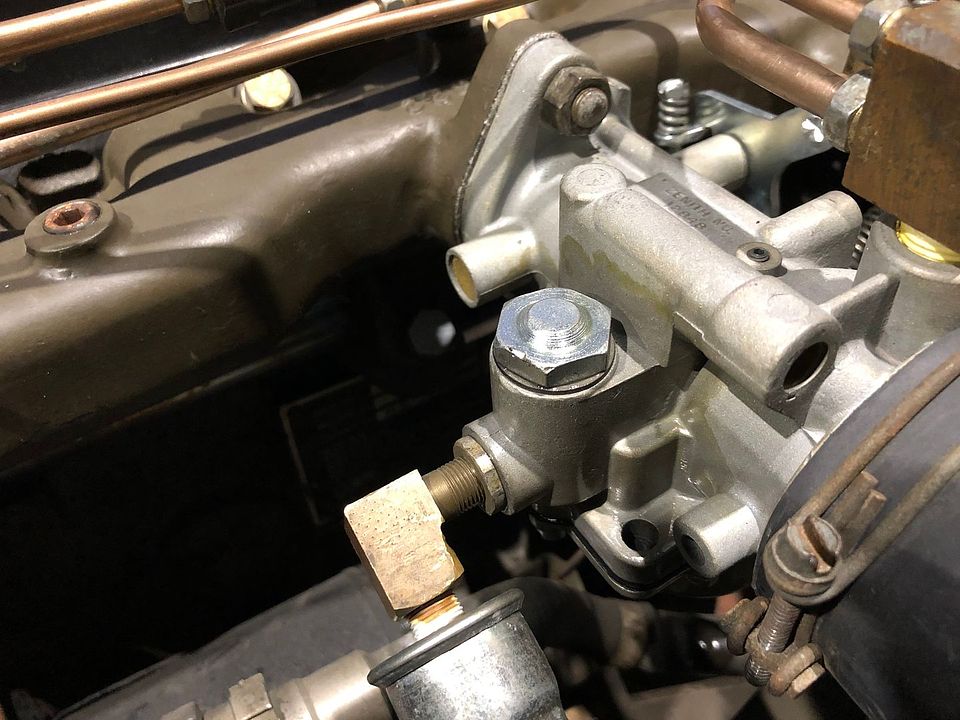
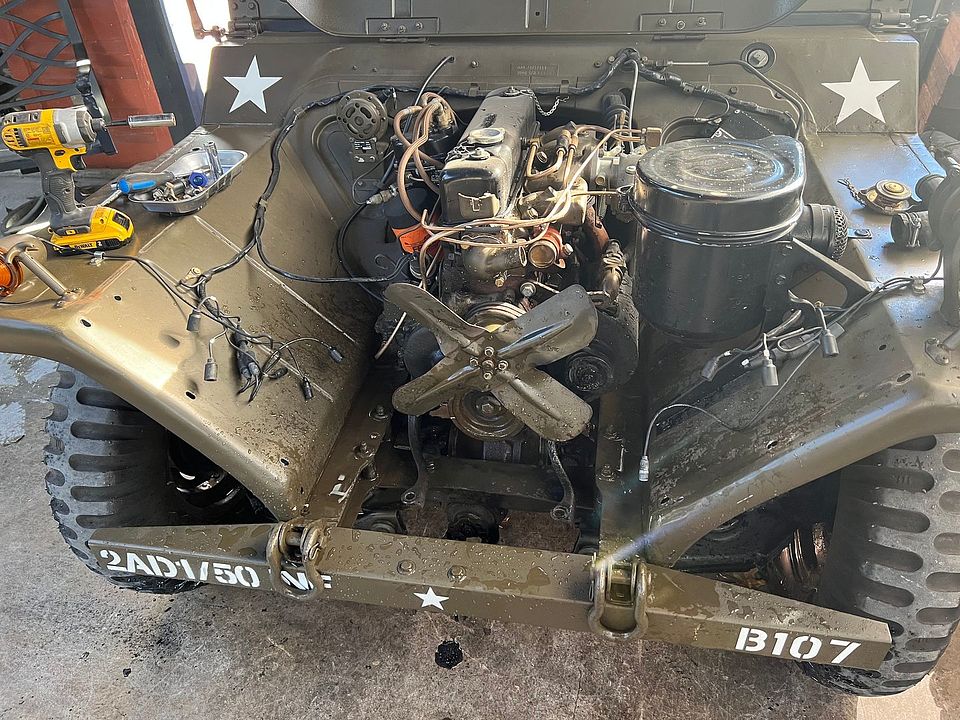
Well I figured why my MUTT was running erratic. On the start up it would run great but only after warming up it would run erratic. I went through everything, "Fuel filter, valve adjustment, new points, rebuilt distributor, replaced in tank fuel pump, timing, vent lines, air cleaner oil) it was the carburetor. So I just purchased a Zenith carburetor from Army Jeep Parts. I know Army Jeep Parts provides some good stuff but after I installed the Zenith it it had a major leak at the inline filter housing it was the washer mounted wrong so when I removed it, it was missing the filter
Image
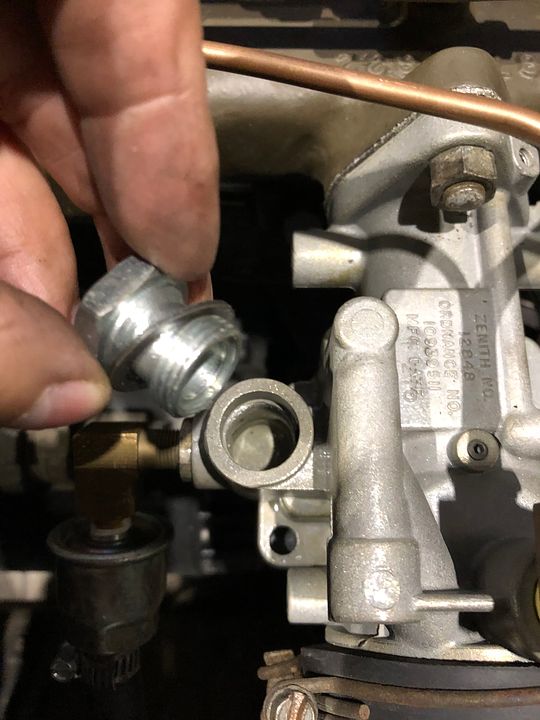
and the reason why because the bolt apparently was broken off so they never installed the filter.
Image
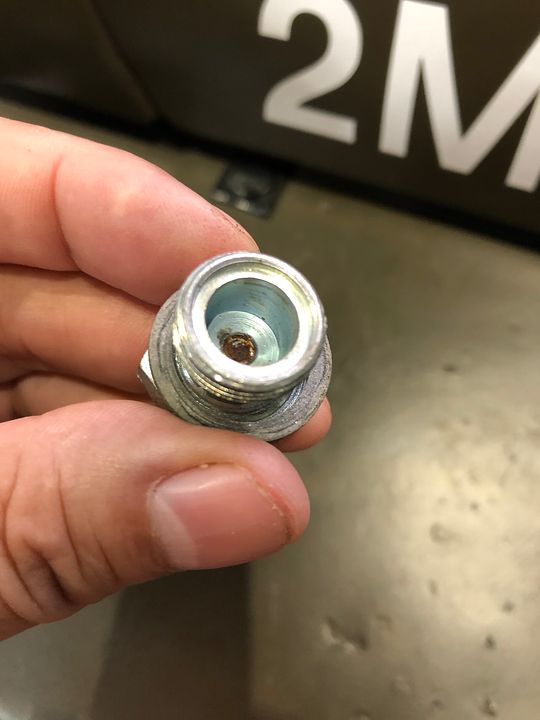
I removed it and used my old one off the bad carburetor. I called them to point this out and I at least I expected a call back just to pass the information. I wasn't angry just wanted to tell them. So guess what they never cared to call me back or answer my phone call. So now I just posted my experience. So for us non rebuilder of carburetors just double check this before starting it.
Robert

1966 - M151A1
1986 - M998
2007 - M1102
2009 - H3T

Hell on Wheels https://www.youtube.com/channel/UCi_blL ... z7Ukw8gbHg


User avatar
muttguru
G-Colonel
G-Colonel
Posts: 1698
Joined: Fri Jul 18, 2003 11:46 am
Location: Lil' ol' England
Contact:

Re: M151A1 begining of new project

Post by muttguru » Thu Nov 18, 2021 3:32 am

Robert, not to add to your problems but...... am I right in thinking that the mixture screw is the concealed type? (It's certainly not the external adjustable version unless you have taken it out for some reason), so if I were you, I'd put a blob of silicone into the screw-hole to prevent water and dirt but also to prevent the screw from moving.

Ken
Contact address - muttguru@aol.com
Always wanted - Details and pictures of M416 Trailer data plates & M151 data plates & body-tags for my research. Thanks!

Rickf
G-Lieutenant General
Posts: 5918
Joined: Sun Mar 19, 2006 10:04 am
Location: Pemberton, New Jersey

Re: M151A1 begining of new project

Post by Rickf » Thu Nov 18, 2021 4:44 am

Good catch Ken, You would think that if they rebuild a 12848 that they would use the correct idle needle. Even the rebuild kits come with the external needle. So IF they rebuilt it they just grabbed an old needle from a 13660 that was laying around. Not exactly what I would call quality work.
1964 M151A1
1984 M1008
1967 M416
04/1952 M100
12/1952 M100- Departed
AN/TSQ-114A Trailblazer- Gone

User avatar
Hell On Wheels
G-Colonel
G-Colonel
Posts: 1530
Joined: Fri May 04, 2007 1:19 pm
Location: San Antonio, TX
Contact:

Re: M151A1 begining of new project

Post by Hell On Wheels » Thu Nov 18, 2021 6:37 pm

Ken,
I see that is a good point to seal it up. On the old carburetor I never had any type of leak from the screw/filter so as I used the old one and it sealed up good and runs great. Here is the first picture of the first run at start up you can actually see where it was leaking. As the housing was saturated with fuel. I'm glad I caught it fast can you image a fire :shock:

Image

now that is was changed it runs perfect. On the old screw/filter it had the filter and the screw was actually frozen in place so I didn't want to try to remove the screw and I left the screw and filer. I reinstalled it into the rebuilt carburetor. The actual rebuild was good its that only last part that wasn't tighten up to send it out as Rick states not quality work.
Robert

1966 - M151A1
1986 - M998
2007 - M1102
2009 - H3T

Hell on Wheels https://www.youtube.com/channel/UCi_blL ... z7Ukw8gbHg

Rickf
G-Lieutenant General
Posts: 5918
Joined: Sun Mar 19, 2006 10:04 am
Location: Pemberton, New Jersey

Re: M151A1 begining of new project

Post by Rickf » Thu Nov 18, 2021 6:44 pm

That gasket seems to want a lot of torque on it. I have had a lot of trouble with that one. I not put sealer on all of the rebuilds I do on that gasket plus I give it a good grunt when tightening. They could have used a softer gasket in my opinion. The one on the accelerator jet that goes in the bottom of the bowl is another one that tends to leak and I will use sealer on that one also.
1964 M151A1
1984 M1008
1967 M416
04/1952 M100
12/1952 M100- Departed
AN/TSQ-114A Trailblazer- Gone

User avatar
Hell On Wheels
G-Colonel
G-Colonel
Posts: 1530
Joined: Fri May 04, 2007 1:19 pm
Location: San Antonio, TX
Contact:

Re: M151A1 begining of new project

Post by Hell On Wheels » Thu Nov 18, 2021 6:47 pm

Hey Rick,
oh yes I see that one, Ill keep an eye on that one. So what torque do you put on it, I used a good snug.
Robert

1966 - M151A1
1986 - M998
2007 - M1102
2009 - H3T

Hell on Wheels https://www.youtube.com/channel/UCi_blL ... z7Ukw8gbHg

Rickf
G-Lieutenant General
Posts: 5918
Joined: Sun Mar 19, 2006 10:04 am
Location: Pemberton, New Jersey

Re: M151A1 begining of new project

Post by Rickf » Fri Nov 19, 2021 4:21 am

If you are talking about the jet it is a flat head screw and brass so you are limited on how tight you can go, I will put it in pretty snug on a dry gasket but if it leaks I immediately take it out and let the gasket dry and put a tiny bit of #3 Permatex sealer on the gasket and then again snug it tight. Never leaks again. The Permatex will allow you to remove it later if need be but I do not suggest it unless absolutely necessary, that is a hard gasket to find and even harder to make. It will come off several times without damaging the gasket but each time you chance it not sealing again.
1964 M151A1
1984 M1008
1967 M416
04/1952 M100
12/1952 M100- Departed
AN/TSQ-114A Trailblazer- Gone

User avatar
Hell On Wheels
G-Colonel
G-Colonel
Posts: 1530
Joined: Fri May 04, 2007 1:19 pm
Location: San Antonio, TX
Contact:

Re: M151A1 begining of new project

Post by Hell On Wheels » Sat Jan 29, 2022 7:58 am

ok winter has finally set it for San Antonio and its not so cold during the day 45-55 a good time to do some vehicle maintenance outside. I have my vehicles parked under a carport. I have been spending lots of time working on my hmmwv. Today I decided to take the MUTT for a spin and I went outside to remove my cover from the MUTT and take it for a drive. So after starting it I heard some rattling. Turns out the fan shroud broke loose from the radiator :oops: .
Image
One time I seen this bracket coming loose so I placed some JB weld on it and it never gave me any problem. Turns out today I see the weld spots on the radiator to fan shroud broke loose. I'm guessing I would just spot weld that but isn't the radiator made out of aluminum? Can that just be mig welded? Or should I take it to a radiator shop to weld? I don’t have a tig welder.
Robert

1966 - M151A1
1986 - M998
2007 - M1102
2009 - H3T

Hell on Wheels https://www.youtube.com/channel/UCi_blL ... z7Ukw8gbHg

User avatar
W. Winget
LTC, U.S. Army
LTC, U.S. Army
Posts: 4468
Joined: Mon Dec 16, 2002 10:37 am
Location: USA, Virginia, Carrollton
Contact:

Re: M151A1 begining of new project

Post by W. Winget » Sat Jan 29, 2022 8:33 am

If its an original,, it's s brass, solder only, no mig weld possible..
So yes a radiator shop would be smart if they still fix radiators vs a replacement only type business.
V/R W. Winget
Looking for 1918 Standard B 'Liberty' truck parts

User avatar
Hell On Wheels
G-Colonel
G-Colonel
Posts: 1530
Joined: Fri May 04, 2007 1:19 pm
Location: San Antonio, TX
Contact:

Re: M151A1 begining of new project

Post by Hell On Wheels » Sat Jan 29, 2022 8:48 am

Yes we have many old school radiator shops to dip, clean out and refurbish radiators. I guess the advantages of living in a big city, thanks. I’m taking it out to take it somewhere in town.
Robert

1966 - M151A1
1986 - M998
2007 - M1102
2009 - H3T

Hell on Wheels https://www.youtube.com/channel/UCi_blL ... z7Ukw8gbHg

User avatar
Hell On Wheels
G-Colonel
G-Colonel
Posts: 1530
Joined: Fri May 04, 2007 1:19 pm
Location: San Antonio, TX
Contact:

Re: M151A1 begining of new project

Post by Hell On Wheels » Sat Jan 29, 2022 5:07 pm

removed the radiator going to clean up some parts
Image

bottom bracket left side disconnected
Image

top of left side bracket broke loose
Image

removed my fan to clean up and paint seen this number stamped into the blade. More than likely a part number 8342323 but what does SC and 9C6 mean? odd stamps numbers any idea what this may mean?
Image

still cleaning some parts up and on Monday I'm going to take the radiator to a shop to get some prices.
Robert

1966 - M151A1
1986 - M998
2007 - M1102
2009 - H3T

Hell on Wheels https://www.youtube.com/channel/UCi_blL ... z7Ukw8gbHg

User avatar
W. Winget
LTC, U.S. Army
LTC, U.S. Army
Posts: 4468
Joined: Mon Dec 16, 2002 10:37 am
Location: USA, Virginia, Carrollton
Contact:

Re: M151A1 begining of new project

Post by W. Winget » Sat Jan 29, 2022 6:41 pm

My guess on the stamping:
Manufacturers Initials
Part Number
Date Code of manufacture

Now as to whom SC is, and the Date Code breakdown...no clue.
V/R W Winget

PS: If economically possible, ask the radiator shop to rod the core, this cleans out all the years of blockage and basically means they will unsolder/resolder the tanks and sides anyway. End result, you will have a new reliable radiator. WAW
Looking for 1918 Standard B 'Liberty' truck parts

markrdje
USMC Sergeant
USMC Sergeant
Posts: 947
Joined: Sat Jun 13, 2009 12:44 pm
Location:

Re: M151A1 begining of new project

Post by markrdje » Sat Jan 29, 2022 7:19 pm

One time long ago, I took radiator shop to fix leak, went to pick it up, he denied ever having it.
change user name to mark

User avatar
Hell On Wheels
G-Colonel
G-Colonel
Posts: 1530
Joined: Fri May 04, 2007 1:19 pm
Location: San Antonio, TX
Contact:

Re: M151A1 begining of new project

Post by Hell On Wheels » Mon Jan 31, 2022 7:07 am

I know the risk of dropping off parts to be refurbished.

I do have a question for my MUTT experts. I finally removed the front end items to finally be able to see the inside of my crankshaft pulley. At one time I was trying to look for timing marks and I could find them, are these three dot punch's it?

Image

Did some engine cleaning and painting turned out nice. The front end had some old crud from previous oil leaks that accumulated to thick oil dirt build up. Did some cleaning and tuned out looking nice. I shouldn't now have any oil dirt spots because I have no leaks.

Image

Image

until the time I decide to pull the engine to replace the clutch, plate, engine mounts, and A arm bushings. When this happens Im doing the metal work I'm dreading the hours will take.
Robert

1966 - M151A1
1986 - M998
2007 - M1102
2009 - H3T

Hell on Wheels https://www.youtube.com/channel/UCi_blL ... z7Ukw8gbHg

Rickf
G-Lieutenant General
Posts: 5918
Joined: Sun Mar 19, 2006 10:04 am
Location: Pemberton, New Jersey

Re: M151A1 begining of new project

Post by Rickf » Mon Jan 31, 2022 11:12 am

The punch marks are not timing marks. Unless someone put them there for that reason but it would not make sense to have timing marks where you can't line them up with the pointer. Plus there are three of them. You should only have one. The correct timing mark is a groove on the edge of the belt pulleys. If you really can't find it take the distributor cap off and bring the rotor around to where it is pointing at number one plug wire and then look at the pulley around where the pointer is and you should see something, may not be much but it will be there. And just because the rotor looks like it is pointing at number one does not mean the notch on the pulley will be exactly in line with the pointer, odds of getting it perfectly lined up that way are slim. It should be within 1/8 turn of the pointer I would say.
1964 M151A1
1984 M1008
1967 M416
04/1952 M100
12/1952 M100- Departed
AN/TSQ-114A Trailblazer- Gone


Post Reply

Return to “M151 General Discussion Board”

Who is online

Users browsing this forum: No registered users and 27 guests